- Home
- >
- Software Development
- >
- README Loud and Clear Using Git Markdown – InApps 2022
README Loud and Clear Using Git Markdown – InApps is an article under the topic Software Development Many of you are most interested in today !! Today, let’s InApps.net learn README Loud and Clear Using Git Markdown – InApps in today’s post !
Read more about README Loud and Clear Using Git Markdown – InApps at Wikipedia
You can find content about README Loud and Clear Using Git Markdown – InApps from the Wikipedia website
Hail, fellow Git pilgrims! As we wind down our tutorial series on learning Git and GitHub from your first git init to your most recent pull request, we now pause to consider the humble, often overlooked, README.md file.
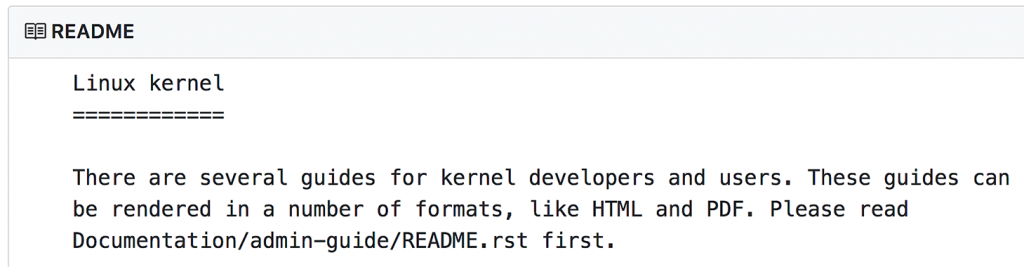
What is a README.md, exactly, in GitHub land? When you visit any repository on GitHub, the first thing you see is the file tree — which, for massive open source projects like the Linux kernel, can be dozens of lines long. Directly below the list of project files is where you find the README.
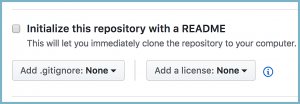
The README is like the public face of your work. It’s the first way most people who come to your repo will interface with your project, and it’s so important that GitHub includes README creation prompts in the repository setup workflow:
Too many developers, however, either skip the README entirely, or put some generic boilerplate text in. We’ve all done it, every one of us with the intent to come back later and do it right. Which happens approximately never. This is understandable; software development is a fast-flowing river, and it’s super hard to paddle back upstream to revisit any code that is not a problem/bug/actively on fire. That doesn’t mean it’s good, though. In fact, it’s really bad to skimp on your README.
How bad? Well, Tom Preston-Werner, one of the founders of GitHub, wrote a compelling essay about README Driven Development: “The Readme should be the single most important document in your codebase; writing it first is the proper thing to do…
First. As in, before you write any code or tests or behaviors or stories or ANYTHING. I know, I know, we’re programmers, dammit, not tech writers! But that’s where you’re wrong. Writing a Readme is absolutely essential to writing good software. Until you’ve written about your software, you have no idea what you’ll be coding.
So. Don’t be That Guy who clearly works really really hard creating an open source project, puts it up on GitHub with no README whatsoever… and then sits there wondering why nobody is forking their project. Or even looking at it. Because, um, you failed to tell us what it even IS?
Writing a Great README
What, then, are the elements of a great README?
Every one of the 27 million public repositories on GitHub represents a project, from entire JavaScript frameworks to tiny single-function software packages somebody, somewhere, thought might be useful. So there is no one set way of writing a README that works for all repos. On the other hand, every single one starts the same way: WHAT YOUR PROJECT DOES.
(Seriously. If you are having trouble getting started writing a README, here is a sentence prompt: “My project is…”. Now fill in the rest by telling us about This Thing I Made, ‘k?)
Here is a list of what a typical README will contain:
- What your project does
- How to install it
- Example usage
After that, you might consider including some of these other helpful sections:
- How to set up the dev environment
- A FAQ
- Changelog
- License and author info
Using Markdown to Make Your README Look Professional
So above is the info you need to include. Here is a guide to (1) how you might maybe format it and (2) how to do that formatting with GitHub Flavored Markdown. This is a GitHub-specific markdown language, as in a lightweight text-based syntax for formatting text. Plainly put, it’s a bunch of hash signs and other symbols you use with text to make things bigger or bolder or otherwise change their appearance. Think of it as styles file for a webpage, only without the pesky HTML and CSS.
Markdown works on GitHub with any file that has .md or .markdown extensions. Like, README.md. You can also use it to create colorful pull request comments, and even in commit messages. You can even include emojis!
If you’ve never used markdown before, don’t be intimidated. It’s dead simple. You simply create a README.md file, open it in your fave text editor and start typing. Remember: the text, what you’re saying about your project, is the important part. Don’t get too caught up in styling. (That said, a stylish-looking README will only be an asset, so do have some fun with it).
First Step: Project Title and Description.
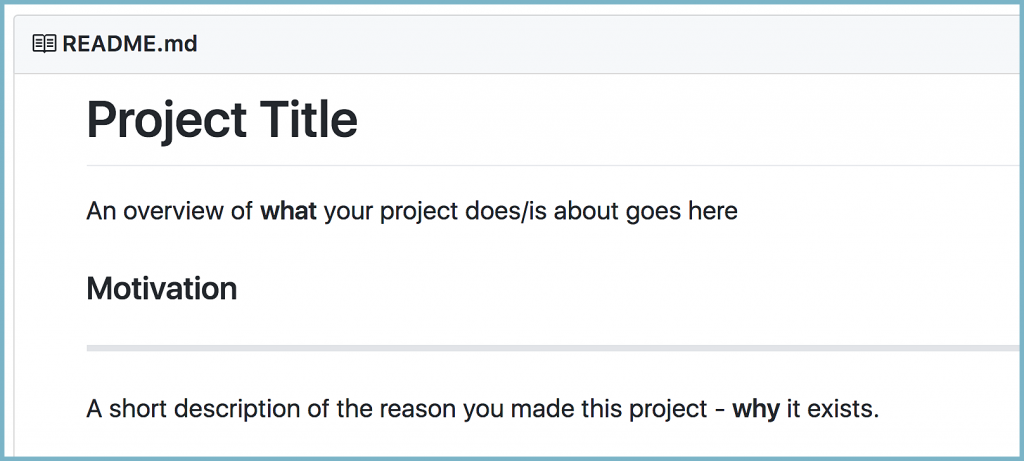
How we worked this markdown magic:
# Project Title
An overview of **what** your project does/is about goes here
### Motivation :rocket:
—————————
A short description of the reason you made this project – **why** it exists.
Markdown is so basic: you just type in your desired text, then tell it what to do by attaching certain symbols to it. If you want a blank line, you insert one blank line — or more, if you want bigger blank space — in between two lines of text.
- The hashtag controls text size:
# This is the largest title font size (think <h1> tag in HTML)
## This is a bit smaller, for sub-headings (like <h2> tag)
###### This is as small as it gets before regular text.
Since your project title should probably big, you write it out as “# My Project Title” (the space between the beginning markdown symbol, here a hashtag, and the first letter of the title is important).
- . Typing a row of em dashes ( – – – – -) will draw a solid divider line on screen.
- Want to emphasize text? Use the asterisk symbol. “ **I am bold!** “ will generate I am bold!, while “*I am oblique!” produces I am oblique!
- Emojis are easy: check out the emoji cheat sheet. (Pro tip: if you use Slack, you’re already familiar — it’s the same markdown library). Pick your emoji, then type the name between two semicolons: “:rocket:” produces the rocketship symbol lots of people like to include in initial commit messages, for example.
Add Links, Code Samples and Screenshots.
Other README content that jazzes up the appearance of your project’s repository landing page while simultaneously providing valuable user information:
- Links to other resources, like APIs.
- Code samples
- Screenshots/images
So our next section, Technical Information — where you include information about the tools you used to build your project — looks like this. Note the hypertext link to Atom:
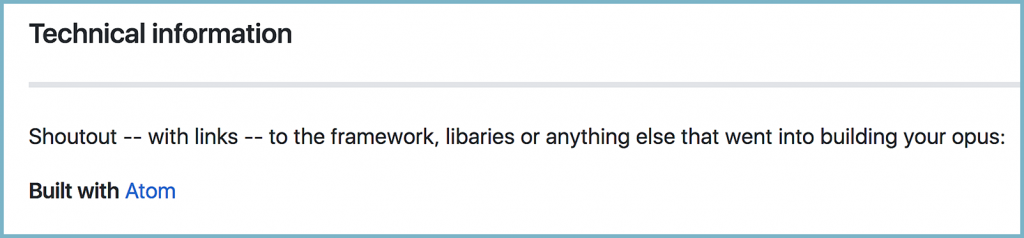
Markdown:
### Technical information
—————————
Shoutout — with links — to the framework, libraries or anything else
that went into building your opus:
**Built with** [Atom](https://github.com/atom)
Again, we are using hashtags and asterisks to create title-sized and bold text effects, and a row of dashes to create a line.
The markdown for inserting an external link is “ [Link text here](https://url goes here)” So, the text you want to serve as your link anchor goes inside two brackets [ ], immediately followed — no space in between — by ( ) parentheses containing the url.

Once more, Slack users will already know how to do this: enclose inline code snippets in single backticks and code blocks in triple backticks. Markdown will take care of the formatting:
```javascript
function fancyAlert(arg) {
if(arg) {
$.facebox({div:‘#foo’})
}
}
```
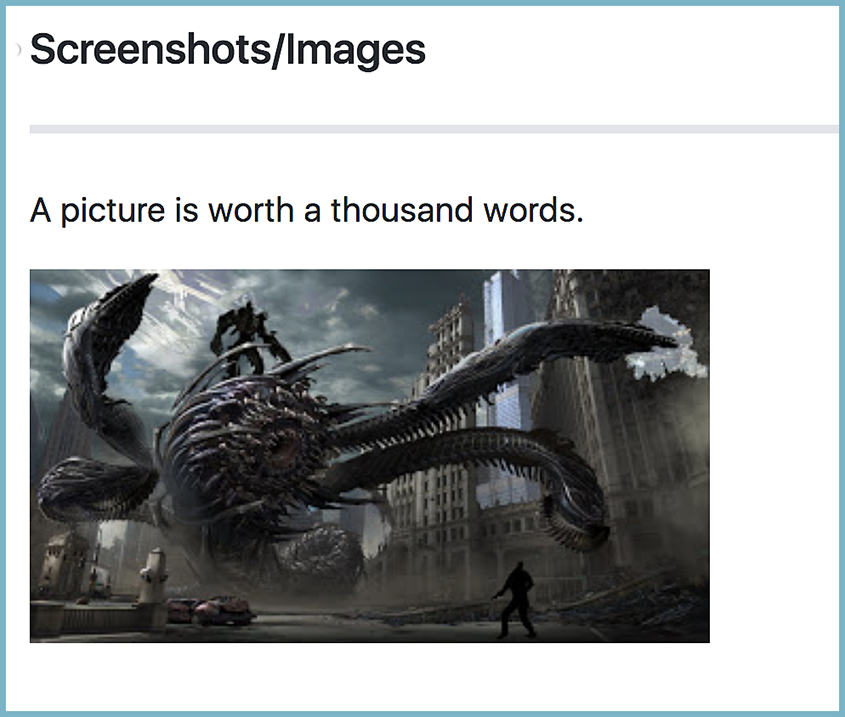
Ideally you would have an equally compelling screenshot of your brilliant open source software/library/npm module to draw interest to your project. A voracious giant robot centipede worm works, too.
The markup is nearly identical to inserting a hyperlink, so be careful. The main difference is that an image/screenshot is prefaced with a ! bang symbol:
### Screenshots/Images
—————————
A picture is worth a thousand words.

Note how the [ ] brackets and ( ) parentheses syntax is otherwise identical. You can use a link to an externally hosted image, or an internal path to assets hosted on your project repo.
That’s It. Really.
Well, not really really. There are a few other markdown toys to play with, but these are the essentials for putting together a simple but effective, attractive-looking README on your GitHub repository.
See? Markdown can be fun! Be careful to not get overly caught up in the code at the cost of good content. Just remember: the words really are the most important part.
Feature image via Pixabay.
Source: InApps.net

Let’s create the next big thing together!
Coming together is a beginning. Keeping together is progress. Working together is success.