
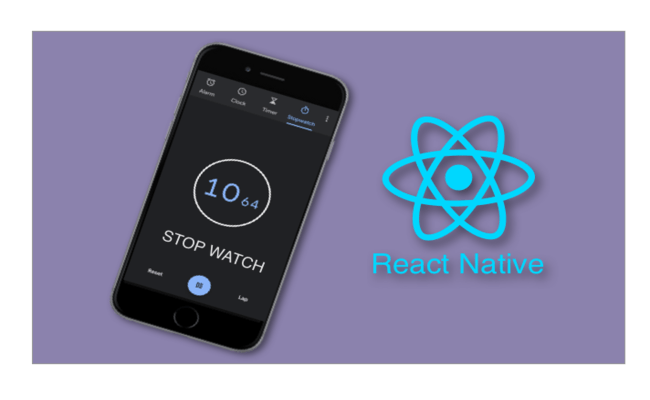
This blog guides you through building a react js stopwatch app for iOS and Android, utilizing React Native's fast and reusable UI components.
This blog will help you install and build your very first mobile app that is a STOPWATCH having just some small understanding of Javascript and ReactJS. You are going to have the most complete beginner understanding of building real-life native apps for both iOS and Android which means LEARN ONCE, WRITE ANYWHERE.

Key Summary
- Objective: Build a stopwatch application in React Native, allowing users to start, stop, reset, and track elapsed time, with a simple and interactive UI.
- Key Steps: Setup Environment: Install React Native CLI or use Expo, set up a project, and configure an emulator or device for testing. Core Components: Use Text for displaying the time (e.g., MM:SS:MS Ascending) for formatting elapsed time. Use Button or TouchableOpacity for start, stop, and reset controls. Use View and styles for layout and design. State Management: Utilize React hooks (useState, useEffect) to manage the stopwatch’s state (e.g., running status, elapsed time). Timer Logic: Implement a timer using setInterval to increment time every 100ms, updating the display with formatted time (e.g., 00:00:0). Event Handlers: Create functions for starting, stopping, and resetting the timer, updating state accordingly. Styling: Apply React Native styles (e.g., StyleSheet) for a clean UI, including centered time display and responsive buttons.
- Setup Environment: Install React Native CLI or use Expo, set up a project, and configure an emulator or device for testing.
- Core Components: Use Text for displaying the time (e.g., MM:SS:MS Ascending) for formatting elapsed time. Use Button or TouchableOpacity for start, stop, and reset controls. Use View and styles for layout and design.
- Use Text for displaying the time (e.g., MM:SS:MS Ascending) for formatting elapsed time.
- Use Button or TouchableOpacity for start, stop, and reset controls.
- Use View and styles for layout and design.
- State Management: Utilize React hooks (useState, useEffect) to manage the stopwatch’s state (e.g., running status, elapsed time).
- Timer Logic: Implement a timer using setInterval to increment time every 100ms, updating the display with formatted time (e.g., 00:00:0).
- Event Handlers: Create functions for starting, stopping, and resetting the timer, updating state accordingly.
- Styling: Apply React Native styles (e.g., StyleSheet) for a clean UI, including centered time display and responsive buttons.
- Key Features: Start: Begins the timer, updating the display in real-time. Stop: Pauses the timer, preserving the current time. Reset: Clears the timer to zero. Optional: Add lap functionality to record split times.
- Start: Begins the timer, updating the display in real-time.
- Stop: Pauses the timer, preserving the current time.
- Reset: Clears the timer to zero.
- Optional: Add lap functionality to record split times.
- Technologies Used: React Native: For cross-platform mobile app development (iOS/Android). JavaScript: For timer logic and state management. React Hooks: For managing component state and lifecycle (e.g., starting/stopping intervals).
- React Native: For cross-platform mobile app development (iOS/Android).
- JavaScript: For timer logic and state management.
- React Hooks: For managing component state and lifecycle (e.g., starting/stopping intervals).
- Best Practices: Use useEffect to manage the timer’s lifecycle, ensuring it stops when the component unmounts to prevent memory leaks. Format time display for readability (e.g., mm:ss:tenths). Test on both iOS and Android to ensure cross-platform compatibility.
- Use useEffect to manage the timer’s lifecycle, ensuring it stops when the component unmounts to prevent memory leaks.
- Format time display for readability (e.g., mm:ss:tenths).
- Test on both iOS and Android to ensure cross-platform compatibility.
- Benefits: Simple project to learn React Native basics (components, state, and event handling). Portable and reusable code for other timer-based apps. Enhances understanding of real-time UI updates in mobile development.
- Simple project to learn React Native basics (components, state, and event handling).
- Portable and reusable code for other timer-based apps.
- Enhances understanding of real-time UI updates in mobile development.
React Native
React Native lets you build mobile apps using only JavaScript. It uses the same design as React, letting you compose a rich mobile UI using declarative components. React Native lets you build your app faster with features like Hot Reloading (no need for recompilation).
React Native uses the same fundamental UI building blocks as regular iOS and Android apps, that means you are not building Web Apps but real-life Native Apps. Instead of using Swift, Kotlin or Java, you are putting those building blocks together with just using JavaScript and React.
Read More:
All You Need To Know About To Host Mean android App On Aws for free
Also, React Native combines smoothly with components written in Swift, Java, or Objective-C. It’s also easy to build part of your app in React Native, and part of your app using native code directly – that’s how the Facebook app works.
Installing React Native
0. You first need to download and install the latest Node version into your local machine. If already installed skip this step. You may follow https://nodejs.org/en/download/
1. Install expo-cli.
#installing expo-cli tool globally
npm install -g expo-cli
#or (if you are familiar with yarn or encountered some problem)
yarn global add expo-cli
2. Creating a new React Native project called “Stopwatch”.
#To your favorite location
#To install all dependencies for project
expo init Stopwatch
#Enter to blank and then enter the project name i.e. Stopwatch

#Move to project
cd Stopwatch

#Starting App
expo start
#or
npm start
#or
yarn start
This would look like this…


3. Install the Expo client app on your iOS or Android phone and connect to the same wireless network as your computer. On Android, use the Expo app to scan the QR code from your terminal to open your project. On iOS, follow on-screen instructions to get a link.
For reference, the app would look like this, click on Scan QR Code and scan the QR Code from the local host which would open after expo start command


Note:- if you encountered any problem or it is not working in your physical device, then you can take the help of Emulators like XCode or Android Studios. you just need to run commands like:- npm run ios, if you have XCode or npm run android for an android emulator.
4. Now that you have successfully run the app, let’s modify it. Open App.js in your text editor of choice and edit some lines. The application should reload automatically once you save your changes.
........
export default function App() {
return (

Basics required before you proceed
-> You should have good knowledge about Javascript. -> React Native is like React, but it uses native components instead of web components as building blocks. Hence, to understand the basic structure of a React Native app, you need to understand some of the basic React concepts, like JSX, components, state, and props.
Let’s start building a Stopwatch application
1. Let’s make the first separate React Component named Stopwatch.
#for making file stopwatch.container.js in directory stopwatch
touch ./stopwatch/stopwatch.container.js
#file: stopwatch.container.js

#import React and Component from react
import  React, { Component } from 'react';
#import these elements from react-native module
import { StyleSheet, Text, View, TouchableOpacity } from 'react-native';
3. Let’s now form it class-based component and export it as default.
#file: stopwatch.container.js

........
class StopwatchContainer extends Component {
    constructor(props){
        super(props);

    }
}

export default StopwatchContainer;
4. Let’s now specify a state for our component as we are going to build a stopwatch application which will dynamically change its content after every interval, and as we know for making dynamic screen we need to use state.
#file: stopwatch.container.js

........
constructor(props){
        super(props);

        this.state = {
            min: 0,
            sec: 0,
            msec: 0
        }
}
.........
5. Now let’s add render function in our class that will start giving shape to our stopwatch. It is the template section if you are familiar with react.js, and let’s use the imported components View and Text here. and Use parameter style into our imported components and give it values which you will later find meaningful, style helps us in giving style to our respective component. padToTwo is a simple javascript function that will be outside the class and it helps in making the digits in stopwatch exactly of length “2”.
#file: stopwatch.container.js
..........
let padToTwo = (number) => (number <= 9 ? `0${number}`: number);
..........
render(){
return(
6. Now let’s form those styles which we gave to our respective component. So, we form a constant outside of class and use the Stylesheet component which we had imported from react-native above, observe the way we wrote styles of CSS here.
#file: stopwatch.container.js

..........
const styles = StyleSheet.create({
    parent: {
        display: "flex",
        flexDirection: "row",
        borderWidth:1,
        borderRadius: 80,
        borderColor: "#694966",
        backgroundColor: '#694966',
        paddingLeft: "8%",
        paddingRight: "8%",
        paddingTop: ".5%",
        paddingBottom: ".5%",
    },

    child: {
      fontSize: 40,
      color: "#C89933",
    },

    buttonParent: {
        display: "flex",
        flexDirection: "row",
        justifyContent: "space-around",
        marginTop: "12%",
    },

    button: {
        backgroundColor: "#694966",
        paddingTop: "5%",
        paddingBottom: "5%",
        paddingLeft: "5%",
        paddingRight: "5%",
        display: "flex",
        borderRadius: 20,
        borderWidth: 1,
        borderColor: "#694966",
        height: 60,
    },

    buttonText: {
        color: "#C89933",
        fontSize: 20,
        alignSelf: "center"
    }
});
...........
7. Now let’s import our StopwatchComonent into App.js file and further style our App.js the same way.
#file App.js
..........
import StopwatchContainer from "./stopwatch/stopwatch.container";
export default function App() {
return (
After Step 7 our stopwatch will look like this.

8. Let’s have some modal/logic into our component now, which will be a simple JavaScript code.
#file: stopwatch.container.ts

..........
constructor(props){
        super(props);

        this.state = {
            min: 0,
            sec: 0,
            msec: 0
        }

        this.lapArr = [];

        this.interval = null;
    }

handleToggle = () => {
        this.setState(
            {
                start: !this.state.start
            },
            () => this.handleStart()
        );
    };

    handleLap = (min, sec, msec) => {
        this.lapArr = [
            ...this.lapArr,
            {min, sec, msec}
        ]

    };

    handleStart = () => {
        if (this.state.start) {
            this.interval = setInterval(() => {
                if (this.state.msec !== 99) {
                    this.setState({
                        msec: this.state.msec + 1
                    });
                } else if (this.state.sec !== 59) {
                    this.setState({
                        msec: 0,
                        sec: ++this.state.sec
                    });
                } else {
                    this.setState({
                        msec: 0,
                        sec: 0,
                        min: ++this.state.min
                    });
                }
            }, 1);

        } else {
            clearInterval(this.interval);
        }
    };

    handleReset = () => {
        this.setState({
            min: 0,
            sec: 0,
            msec: 0,

            start: false
        });

        clearInterval(this.interval);

        this.lapArr = [];
    };
............
9. Now call functions from Touchable Opacities, and some few DOM Manipulations into our template, Touchable Opacity has onPress prop which will help us in callbacks.
#file: stopwatch.container.js
.................
10. Now we need to form a list component where we have to show the list of our laps.
#forming empty file list.component.js
touch ./stopwatch/list.component.js
11. Let’s import some elements as usual from react-native and react. ScrollView helps us to form a list that will be scrollable like you see in your mobile devices. FlatList helps us in forming a list that can be dynamic. It can take many useful props.
#file: list.component.js
import React, {Component} from 'react';
import { ScrollView, FlatList, StyleSheet, Text } from 'react-native';
12. Now let’s make a class component named ListComponent and export it as usual.
#file: list.component.js
..........
class ListComponent extends Component {

}

export default ListComponent;
13. Let’s now form the template for our List Container. Here we again use the padToTwo function for making our number of at least two digits. ScrollView, it helps us in making the list scrollable. FlatList with its props data and renderItem, data takes the array as input and renderItem will loop through them and return some dom/list item.
#file: list.component.js
..........
let padToTwo = (number) => (number <= 9 ? `0${number}`: number);
..........
render() {
return (
14. Let’s now style our component. You can use your imagination for styling.
#file: list.component.js
.........
const styles = StyleSheet.create({
    scroll: {
        maxHeight: "63%",
        backgroundColor: "#C89933",
    },

    item: {
        padding: 10,
        fontSize: 22,
        height: 44,
        color: "#5C415D",
        textAlign: "center",
        backgroundColor: "#fff",
        marginBottom: 1
    },
})
..........
If you reached here, then your stopwatch must look like this.

15. Now let’s import our ListComponent into StopwatchContainer. and pass the props in it.
#file: stopwatch.container.js
..........
This is how our Stopwatch looks like.

Source: InApps.net
Rate this post
Related Articles

Best Countries to Outsource Software Development (2026 Guide)
Software development outsourcing means hiring an external engineering team - usually based in another country- to design, build, or maintain software on your behalf, instead of hiring in-house. Most US, UK, and Australian companies do this to access skilled engineers faster and at a lower fully-loaded cost than domestic hiring allows.

How to Hire Remote Developers Without Losing Code Quality: A 2026 Playbook for CTOs
Every CTO who hires remote developers eventually asks the same question: how do I know this is going to work before I've sunk three months and a sprint's worth of technical debt into finding out? Most guides to hiring remote developers answer a different question: which platform to use. They skip the part that actually determines whether the code that comes back is any good. This playbook covers the vetting mechanics, engagement models, and real rate data behind hiring remote engineers who ship production-quality code from week one, not another list of freelance marketplaces.

IT Managed Services vs Break-Fix IT Support: What Growing Startups Need in 2026
Break-fix IT feels free right up until the week something breaks in production and there is no one already watching for it. Here is how growing startups actually decide between break-fix support and managed services in 2026, and why the decision has gotten sharper for anyone shipping a product built quickly with AI tools.