


- Home
- >
- Software Development
- >
- Rolling Back Changes with Revert and Reset – InApps Technology 2022
Rolling Back Changes with Revert and Reset – InApps Technology is an article under the topic Software Development Many of you are most interested in today !! Today, let’s InApps.net learn Rolling Back Changes with Revert and Reset – InApps Technology in today’s post !
Read more about Rolling Back Changes with Revert and Reset – InApps Technology at Wikipedia
You can find content about Rolling Back Changes with Revert and Reset – InApps Technology from the Wikipedia website
The first rule of Git club is, we don’t pretend the past didn’t happen. Version control means just that, people: managing multiple evolving versions of a project as it progresses. That said, are there are times when we want to turn back time — that is, roll back changes? Hells yeah, especially if we are doing continuous deployment/integration where there is always supposed to be parity between the code in master and the artifact running in production and whatever the fuck that is in our local IDE.
Let’s start with something a little more basic, though. The beauty of Git is, when things go awry with our code, it’s pretty simple to set things right by simply reverting to the last version that DID work. We get to step back in time, to how the world was a few minutes (or months or years) ago by using $git revert or $git reset.
Umm, How Do We Actually View These Previous Commits, Anyway?
Excellent question! This involves traversing git’s branched tree structure, so I refer you to our previous tutorial on working with branches if any of the following seems mysterious.
The tl:dr version: we use $git log to view previous commits, and $git checkout to traverse between them.
The step by step version:
Once you’re several commits into a project, or if you have forked/cloned a repository (which comes packaged with its previous commit history), orrrr if something has simply gone really really wrong in your code and you need to figure out where… Whatever the reasons, eventually there will come a time when you’ll want to take a look at the version history.
Step 1: $git log
Type “$git log.” There are variations — you can add all kinds of arguments to $git log to modify the output — but, by default, plain-vanilla $git log prints a list of all commits made on that repository. It starts with the most recent first, and then moves in reverse chronological order back to the initial commit that started the whole thing. If you run $git log on the master branch of a large project with a lot of collaborators, clearly this output could go on for days. Fortunately, git by default pipes all output through a pager so you see only one page of log output at a time. You can then ask for the next page, and so on, but hopefully most of the time the breakpoint you’re seeking is recent and within a few commits of current.
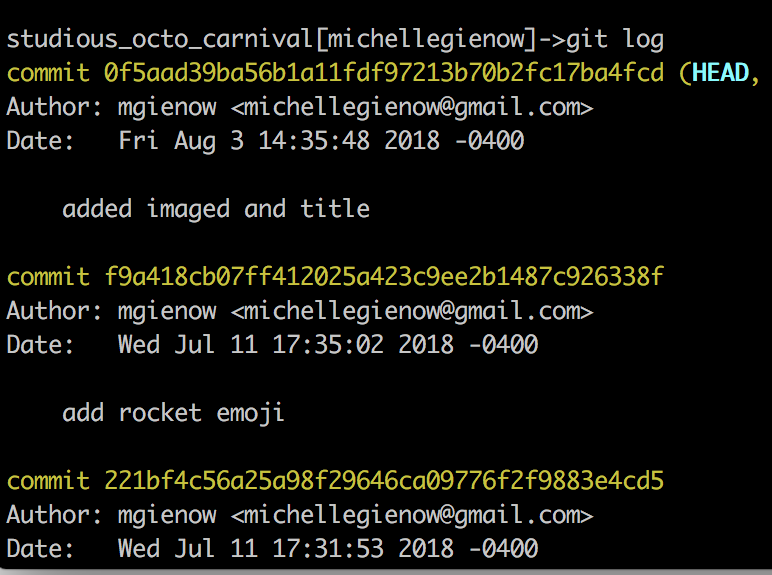
This default format also lists each commit with its unique identifier number (a 40 character SHA-1 generated checksum), the author/committer’s name and email, the date written, and the commit message.
Step 2: HEAD count
Notice that first line and the word HEAD. Recall from our branches tutorial how Git uses a sort of pointer to mark the current state of your files, i.e., the current version you are working in? We call this the HEAD. We can actually move the HEAD reference to point at anything we want, though, and this is the key to rolling back versions. The first step being, identify the version you’re in so you can start searching for the version you want to revert to.
In Git, there are two ways to refer to a particular commit, one of being absolute and the other relative.
- The absolute way is to point exactly at the commit using its unique identifier, that 40 character string of numbers and letters. This is precise, and also a huge pain in the ass. Fortunately, Git allows us to reference just the first 7 characters (of the entire 40 char identifier code)
- The relative way is to use HEAD as a fixed reference point and tell Git how many versions back we want to go. So, to refer to a commit that is the one immediately before the current version, we use HEAD~1. Two before is HEAD~2. You get the idea.
Step 3: Check it out
Now, let’s talking about how to actually check out our previous commits. All we need to do is to use $git checkout <reference name here>. So let’s try moving one commit before the current one using git checkout HEAD~1.
Our process: using our stalwart StudiousOctoCarnival sample project (or the equivalent sample project you created working along with the earlier exercises), let’s add a couple things to create a longer chain of commits. I threw in a photo of a cool looking octopus parade float and a title for the page in index.html. Then staged and committed these changes as per usual git workflow.
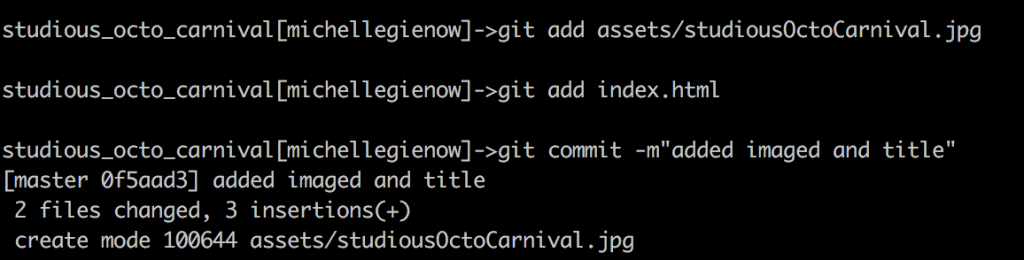
That gives us a version as a starting point. Now, let’s add a caption to the photo, and commit that change, to give us a subsequent version.

So our “add caption” commit is our current version. The absolute identifier for this would be “ab27783” — as you can see in the commit info. The relative identifier is HEAD, because the default has HEAD pointing to the current version unless we tell it to look elsewhere.
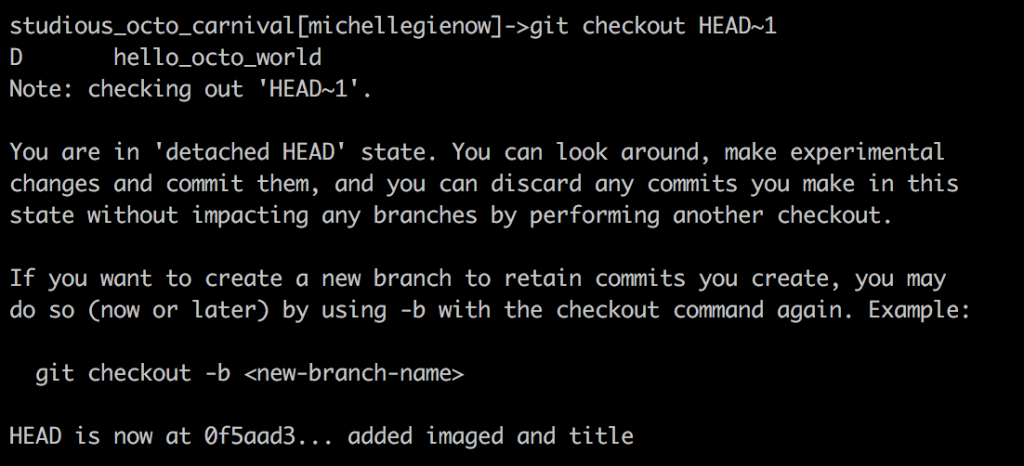
Let’s do just that: point HEAD at the commit previous to our current one. It’s as easy as typing $git checkout HEAD~1:
Now our files are rolled back to the state of one previous commit before current one. We can check by typing $git log to print out the roll call of recent commits — no matter how long ago they were made. Note how the HEAD pointer indicates today’s “added image and title” commit (Git identifier 0f5aad3) and NOT the most recent “added caption” commit (ab27783).
To go back to the latest commit (the “added imaged” commit pointed by HEAD of the remote), we can use $git checkout <name-of-branch>. One thing to remember when we use the relative reference again, it will be relative to the current HEAD pointer, and not the one we manually pointed it at before (which was HEAD minus one version). This is because checking out a branch resets HEAD to current.

So we are safely back home again to the most recent committed version. Bear in mind that this exercise was just to “check out” versions and practice moving between them. Git tells us,
“You are in ‘detached HEAD’ state. You can look around, make experimental changes, and commit them, and you can discard any commits you make in this state without impacting other branches by performing another checkout.”
This is handy for test-driving changes. If things don’t work out, you just checkout back to the current version (or any other you like) using $git checkout and the branch name. Best practice is probably to use the unique identifier, because (a) if you’re moving several versions back and/or forth, it’s easy to get lost and (b) if anyone else is also working in the code base, that could move the relative HEAD and you wouldn’t even realize it unless you remembered to check git log first. So, the absolute checkout is generally the way to go.
(PS: if you liked the changes and wanted to keep them, you simply create a new branch to retain commits: $git checkout -b <new-branch-name>).
Rolling Back and Staying Back: Reset and Revert
Whoops! Just realized we changed our caption to be incorrect, and we need to step back to the previous, correct caption!
We’ve all found ourselves in this situation where something got deployed, caused problems, and had to be rolled back. However, most of the time (hopefully) we figure it out pretty quickly, only a few commits after the problem. This is when a rollback can be done most easily with $git revert or $git reset.
The result of using either one is essentially the same: rolling back to a previous version of the code. However, they work in different ways, and there are situations where one is better than the other.
To Revert or Reset? That Is the Question:
- Interestingly, rather than simply making the now unwanted changes simply vanish, $git revert essentially creates a mirror image of the diff that produced the now-unwanted commit and applies it. This “undoes” the code changes and then commits the result, which on the surface will appear to be what we wanted: all the bad code goes away. However, the commits will all still be there as part of the codebase history, showing first the putting them in, then the taking them out. It might help to think of this as antimatter code getting applied to the original matter: both together cancel each other out.
- On the other hand, $git reset just entirely wipes out the earlier commit and deletes it from the current branch. Gone without a trace. The advantage here is just less code to be stored, and fewer versions to sift through when you mess up again later. The serious drawback, however, is if that deleted code has already been committed we are now messing with the repository history. Which means, if another project collaborator is also working in there, suddenly there is an inconsistency between your version, their version, and possibly even master. Express train to merge conflict hell.
So! If you’ve already committed/pushed, use $git revert.
If you haven’t committed yet, and are working on your own branch all by yourself, you can go ahead and do $git reset. This simply wipes out all your as-yet uncommitted changes and deposits you back on the doorstep of your most recent commit. Try try again. (Also, it helpfully unstages anything you’ve $git add-ed without commiting).
How to Revert/Reset
Step 1: Log it out
We’ve been here before, but just for fun this time let’s try $git log –oneline –all –graph –decorate. This prints out all the previous commits each as one line, graphing a nice little ASCII visual of your branch and merge history, and the output code is helpfully color-coded. (If you would like to custom configure your own $git log commands, check out this guide).
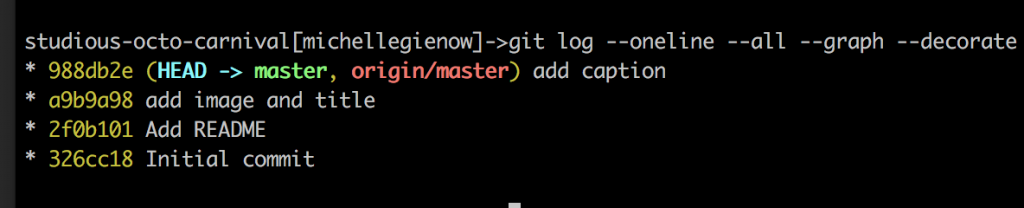
This output tells us two things. (Well, lots of things actually, but right now we care about these two the most). First, our current branch (HEAD) and local master repository are one and the same, d6dfd03. Also that the most recent pushed version (“origin/master” in red) is the same as HEAD, which is what GitHub is tracking. This means we are up to date with the remote repository.
Step 2: Revert
Okay, so now we have our list of commits. Now, let’s say I want to roll back to the “add caption” commit, 988db2e.
Since we have already committed the caption addition, we can’t use $git reset. Remember how reset is useful for wiping out uncommitted changes? Reset will also unstage anything you’ve added in preparation to commit, but it does exactly nothing for anything that has been committed. This is now officially part of git history, even if you haven’t pushed to GitHub, and the only way to roll it back is to $git revert.

Recall how, with Git, revert has a very specific meaning: create a commit with the reverse patch to cancel it out. This way you don’t rewrite any history. But the original “whoops” commit(s) and the patch are always going to be part of the version history.
Let’s log it out again to see that it worked:

However, that other commit — the one we wanted to get rid of — is still there in the log — wtf? Well, Git never forgets: we did commit that. So d6dfd03 “changed caption” was already stored in the chain, and so the evidence of its existence shall persist. Git very helpfully undid everything we wanted undone, and we have gone back to the “good” version we want to start working from afresh. HEAD, master and the remote are all in alignment.
So those artifacts are nothing to worry about: just go ahead and start working on the new changes. Time will move forward from that point. You’ve successfully rolled back to your previous commit of choice and the world is new again.
Source: InApps.net

Let’s create the next big thing together!
Coming together is a beginning. Keeping together is progress. Working together is success.


