


- Home
- >
- Software Development
- >
- Cloning and Forking – InApps Technology 2022
Cloning and Forking – InApps Technology is an article under the topic Software Development Many of you are most interested in today !! Today, let’s InApps.net learn Cloning and Forking – InApps Technology in today’s post !
Read more about Cloning and Forking – InApps Technology at Wikipedia
You can find content about Cloning and Forking – InApps Technology from the Wikipedia website
Welcome back, Git fam! We have come so far together as you learn to get legit with Git: setting up your very first local Git repository and establishing a GitHub account to hold all your project code. Staging, committing and pushing changes while practicing the art of crafting useful and effective commit messages.
Today’s lesson is going to be about forking and cloning repositories, which builds upon the working with Git’s branch feature. Please take a quick spin through that if you need a quick refresher, because the ability to create branches and merge them back into master is (1) an essential skill and (2) utterly necessary to take this next step in effectively working with version control on projects, whether solo or collaborating with a team.
Knowing Your Fork from Your Clone
Forking and cloning are, in many ways, extremely similar actions. Both effectively copy the entire source code of a repository. What sets them apart — and what influences the choice you will make whether to fork versus clone a repo — is the intent behind the move.
To fork a project is to make a copy of the project repository, rename it, and use that copy as a base for a brand new project. Forked projects are rarely ever contributed or merged back to the original (master) repository. You fork a project to rarely, if ever, contribute anything back to the parent project again. It’s the open source code equivalent of that Robert Frost poem: Two branches diverged in a codebase and I… I took the one less traveled by… and that has made all the difference (in helping me speed-start my own new project).
There are all kinds of reasons why a project gets forked. Fundamental to forking is that the original project gets replicated in its entirety to begin life as a new and separate entity that may move on in its own direction — and develop a new and separate open source community of contributors around it. Sometimes this happens because a project has been mothballed for a long while, and there is interest in reviving it: fork that puppy and get to work. Or perhaps an open source project that came into being while nurtured/financially supported by an enterprise organization finds its future in limbo when that company is bought out: the fear is the new parent org might shut down, alter, or otherwise mess with the open source code that came with its new acquisition.
The worst-case scenario for forking a project happens when a community schism occurs and two (or more) factions decide to split from the original project and take things in a different direction, as was the case with node.js forking into io.js. (Thankfully, after a couple years, the contentious issues were resolved and io.js merged back into node.js — that is the beauty of distributed version control in action, people).
The thing to remember is that forking is primarily a social action, undertaken for cultural — rather than technical — reasons.
To clone a project, on the other hand, is more of a technical move. The intent is to create a working copy of a project in order to make changes and then contribute them right back to the project. Cloning is the backbone of open source contributions. In order to contribute to a project that uses Git as its version control system — whether on GitHub or one of the other options out there, like BitBucket — you start by making a clone. This creates an exact copy of the project codebase, and you can make whatever changes or additions you want within that.
In order to contribute your changes back to the original project, you must create a pull request (which will be the topic of our next tutorial). Unless the maintainers of the original repo happen to grant you direct access — essentially, make you a project owner or admin — in which case you can make direct, unsupervised changes… aaaaand possibly create havoc. Preventing this is why the whole clone/pull request workflow exists (◕‿◕).
Decisions, Decisions
There is often confusion about the whole Git clone versus fork thing, which is totally legit. Way back in 2008 when GitHub launched, the powers behind the Octocat curtain designated the word “fork” to represent the action performed in a Git clone command. So forking a GitHub repository is simply creating a clone of that project: a copy on which you can then work your own special magic.
It is entirely possible to fork any project in the original sense, which is to create a brand new separate copy project and build a discrete community around it, rather than sending pull requests to merge back to the original project. You could even fork the Git codebase itself if you wanted to.
However, just about everyone forking any GitHub repo, ever, has done so in order to create a personal working copy. That’s right: They forked when they should have cloned. Even people who should know better get confused. Just six months ago there was a brief scare when Google forked the Swift programming language, implying that Google was taking Swift off the reservation for its own, possibly nefarious, purposes.
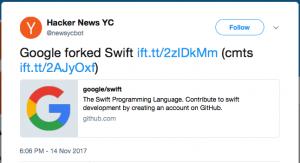
So yes, there was indeed a fork that happened. But it wasn’t a totally forked-up situation because, actually, Google’s intent was pure: clone the project in order to contribute back to it, just like any upright open source citizen.
Forking Off
So now that you understand the differences in intent between forking and cloning, it’s clear that you’re almost always going to be cloning.
Just in case the situation arises, though, here is how to fork a repository on GitHub. Though the implications may be large, the forking process itself is actually quite simple.
- Log into your GitHub account
- Navigate to the repository for the project you are interested in contributing to. (Let’s use our example project).
- Once inside the repo, look for the “Fork” button in the upon the right-hand corner of the UI. Click on this button to begin the automatic forking process.
- A nifty “Forking in progress!” animation opens up:
- Within a few moments, the completed fork will appear *in your own repository* — so navigate back to your GitHub home page and find it there.
- At this point, the forking is all done. From here, you would clone it down to your local work environment, so keep going into the cloning tutorial for those details.
Clone Home
When the great day in your junior coder/developer career arrives and you are ready to make your first open source project contribution, your first step is to clone the GitHub repository for the project you want to contribute to. This creates a copy of that repository in your own GitHub account, enabling you to begin working with the code.
Cloning is part of the Git and GitHub workflow as a protective measure. The rights to public repositories allow anyone to view the code — but not to directly commit into the repository nor create branches on the repo from the master. This allows the project owners and maintainers to control all changes, and prevent unauthorized ones, within their codebase. (Again, changes are merged back into master via pull requests; which we’ll cover next time).
Cloning a project, then, creates a copy — one where you do have permission to make branches, commit, etc. This is your working copy of the project — it is no longer the project itself. You can make changes here to your heart’s content, safe in the knowledge that these will not ripple back to the main repository.
- Log into your GitHub account.
- Navigate to project repository you are interested in working on/contributing to. (Let’s use our example project at https://github.com/mgienow/studious-octo-carnival).
- Clone the code down to your local work environment (your text editor of choice on your computer, my dudes). This is made very simple by the GitHub UI: Clicking on the nice green “Clone or download” button will open a box containing the URL for this specific project. A button — which looks like a clipboard — to the right-hand side of the URL allows you to copy it into your clipboard. Click that to copy the link.
- Open your terminal and navigate to wherever you want to keep the repository on your computer. Desktop, a special “projects” folder, whatever works.
- Now clone in your project, which is done by typing in the “git clone” command and then pasting in the link. $git clone https://github.com/mgienow/studious-octo-carnival.git
- Once the command completes you will have a new folder containing the cloned repository.

- Navigate to that folder: this is a step many beginners miss, so make sure to “cd yourFolderNameHere” immediately after cloning.
- The final step is to set up a remote which points to the main repository. Remotes simply represent paths to other versions of your repository — sometimes these are URLs, if those versions are in the cloud. Since we cloned from our GitHub repository, Git automatically sets up a default remote for us called origin. Having this pointer to origin allows us to push and pull code from the GitHub repository that hosts the project. We can list the currently configured remotes on our machine using the “git remote” command:

The Ol’ Push-Pull
Pushing and pulling from your own working version of the cloned project is very useful, in fact how you will most often work with the code.
However, every time you go to work on that code, you’ll want to be starting from the freshest, most recent version. It’s possible that things may have been updated and changed since you first cloned the repo down from GitHub into your local. It is important to bear in mind there are two possible levels where change may have occurred:
- if you were working on this project remotely from another computer, storing changes in between by pushing them to GH, you would pull from your own origin — the repository in your GitHub account that is the copy of the original project.
- Ditto if you are working with other co-contributors, who may have made changes in the interim.
In this case, we do a simple $git pull which reaches to the current upstream remote, matches it to what you’ve got locally, and either updates your local to match the newer version on GitHub or lets you know that you’re good to go by returning an “already up-to-date” message.

If, however, you need to refer back to the master project — the one you first cloned from, into your own GitHub account and then your own local environment — we need to set up a second remote which points to that original repository, the one we cloned from in the first place. Recall that we do not have commit rights there — we can’t push changes to the original repository. But we can pull down — fetch — the latest version.
To create a new remote we use the $git remote add command, passing in a name for the new remote and the URL for the remote we want to add as arguments. We can get this by heading back to GitHub in our browser. From our home repository, we can use the convenience link to take us back to the main repository, the one where we originally cloned it from.
Once back in the studious_octo_carnival main project we can use the same steps as we previously used to access the clone URL via the green GitHub “Clone or download” button and copy it to our clipboard.
Back in terminal, to add our remote pointing to the repository of first origin, we type:
|
$git remote add upstream <a href=“https://github.com/mgienow/studious_octo_carnival”>https://github.com/mgienow/studious_octo_carnival</a>. |
“Upstream,” like “origin” is a naming convention in Git. We could actually name the remote “Fred” or anything else we want, but upstream is both easy and ensures anyone else looking at our code will understand what the heck is going on here. Run the “git remote” command again we can verify that we now have two remotes, origin and upstream.
Code Happens
Now is when you’d work on the project, of course saving your changes early and often in a series of commits with, of course, well-written commit messages explaining each why each change was done.
Once you’ve finished writing/debugging/changing whatever code was wanted, and committed your last commit, it’s time to push everything back to GitHub.
If you’re pushing to your own project repository, you’ve got this — we’ve done this plenty of times by now!
If, however, you are hoping to contribute this code back to the original (master) repository, and have your changes folded into the open source project … that is going to take a bit more doing.
Get ready to make your first pull request. Tune in next time on Getting Legit with Git and GitHub!
Feature image by Alejandro Escamilla on Unsplash.
Source: InApps.net
List of Keywords users find our article on Google:
| github fork or clone |
| bitbucket pull request |
| wireguard github |
| bitbucket base branch |
| my forking life |
| cloning technology 2022 |
| chi you clone |
| whatsapp clone github |
| bitbucket pull request template |
| fork bitbucket repo |
| how to create pull request for specific commit bitbucket |
| bitbucket how to fork |
| git clone all branches |
| merge branch bitbucket |
| git branch vs fork |
| git remote add origin bitbucket |
| git pull new branch from remote |
| bitbucket base url |
| near protocol github |
| git add remote repo |
| git set origin |
| clone app development company |
| git clone 2022 |
| master your mind wikipedia |
| robert github |
| difference between fork and clone |
| bitbucket protect master branch |
| create pull request bitbucket |
| create pull request in bitbucket |
| github reservation system |
| bitbucket prevent push to master |
| push and pull wikipedia |
| backbone wikipedia |
| facebook-clone github |
| github search exact match |
| bitbucket fork vs branch |
| bitbucket rename repository |
| how to create a pull request in bitbucket |
| git clone https github |
| bitbucket merge branch to another branch |
| fork in bitbucket |
| github remote jobs |
| interim ui design job |
| interim ux design job |
| download branch from bitbucket |
| git view pending commits |
| what is a fork git |
| bitbucket how to create pull request |
| clipboard master alternative |
| create pull request for specific commit bitbucket |
| close branch bitbucket |
| create fork bitbucket |
| how to create pull request bitbucket |
| what is github fork |
| bitbucket move repository to another project |
| git list remote branches by date |
| junior node js developer remote |
| bitbucket fetch pull request |
| bitbucket close branch after merge |

Let’s create the next big thing together!
Coming together is a beginning. Keeping together is progress. Working together is success.


