


- Home
- >
- Software Development
- >
- Working with Branches in Git and GitHub – InApps Technology 2025
Working with Branches in Git and GitHub – InApps Technology is an article under the topic Software Development Many of you are most interested in today !! Today, let’s InApps.net learn Working with Branches in Git and GitHub – InApps Technology in today’s post !
Key Summary
This InApps.net article, published in 2022 and authored by Phu Nguyen, provides a beginner-friendly guide to using branches in Git and GitHub for version control. Written with a technical, tutorial-focused tone, it aligns with InApps Technology’s mission to educate on software development practices, emphasizing safe and collaborative coding workflows.
Key Points:
- Context: Git and GitHub enable version control through branching, allowing developers to work on changes safely without disrupting the main project, crucial for collaborative development.
- Core Insight: Branching in Git creates isolated environments for code changes, protecting the deployable master branch and enabling safe experimentation, with changes merged back only after validation.
- Key Features:
- Branching Basics:
- A branch is a unique set of code changes with a distinct name, with the master branch serving as the official, deployable version.
- Branches prevent conflicts in group projects by isolating changes until they’re ready to merge.
- Workflow:
- Create a branch (e.g., hello_octo), make changes, stage, and commit them.
- Merge changes back to the master branch locally, then push to GitHub for synchronization.
- Delete merged branches using git branch -d branchName to maintain a clean repository.
- Best Practices:
- Avoid direct changes to the master branch to prevent merge conflicts and project disruptions.
- Regularly check the current branch (HEAD) to ensure changes are committed to the correct branch.
- Safety Mechanisms:
- Git prevents deletion of unmerged branches, reducing accidental data loss.
- Practice with sample projects to master the workflow before tackling complex merges.
- Branching Basics:
- Outcome: Mastering Git branching ensures safe, collaborative development, with InApps promoting its adoption for efficient version control in 2022.
This article reflects InApps.net’s focus on software development education, offering a practical guide to using Git and GitHub branches effectively.
Read more about Working with Branches in Git and GitHub – InApps Technology at Wikipedia
You can find content about Working with Branches in Git and GitHub – InApps Technology from the Wikipedia website
In our previous tutorials for the git version control software, we learned the essential basic commands for using git, as well as how to work with Github.com to establish a repository and push our project code to the website.
Now it is time to start actually working with GitHub (and git) the way they are meant to be used: making changes in the project safely off to one side, and merging them back into the original project once they have proved to be correct. Or at least not disastrous.
By now you understand that git saves each version of your project as a snapshot of the code exactly as it was at the moment you committed it. Essentially creating a timeline of versions of a project as it progresses, so that you can roll back to an earlier version in the event disaster strikes.
The way git, and GitHub, manage this timeline — especially when more than one person is working in the project and making changes — is by using branches. A branch is essentially is a unique set of code changes with a unique name. Each repository can have one or more branches. The main branch — the one where all changes eventually get merged back into, and is called master. This is the official working version of your project, and the one you see when you visit the project repository at github.com/yourname/projectname.
Do not mess with the master. If you make changes to the master branch of a group project while other people are also working on it, your on-the-fly changes will ripple out to affect everyone else and very quickly there will be merge conflicts, weeping, rending of garments, and plagues of locusts. It’s that serious.
Why is the master so important to not mess with? One word: the master branch is deployable. It is your production code, ready to roll out into the world. The master branch is meant to be stable, and it is the social contract of open source software to never, ever push anything to master that is not tested, or that breaks the build. The entire reason GitHub works is that it is always safe to work from the master.
Branching Out
Instead, everyone uses branches created from master to experiment, make edits and additions and changes, before eventually rolling that branch back into the master once they have been approved and are known to work. Master then is updated to contain all the new stuff.
To begin working on anything new in a project, or to change existing things, you create a branch off the stable master branch. Let’s continue working with the sample project created for our previous tutorial, good ol’ studious_octo_carnival. Please now open up your version on your computer and cd into the directory.
Step 1: Take inventory.
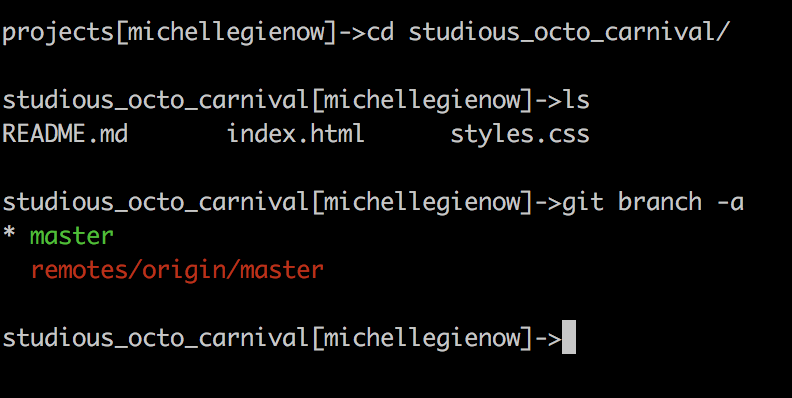
Prior to creating new branches, we want to check for any other existing branches. We know about the master, but who knows what our project collaborators may be up to, those mischievous monkeys? So we can view all existing branches by typing “git branch -a” into terminal, which tells git that we want to see ALL the branches in this project, even ones that are not in our local workspace.
This returns output you see in the code example below. Its appearance may vary somewhat depending on your OS and terminal application, but the info is ultimately the same. The asterisk next to “master” in the first line of the output indicates that we are currently on that branch. The second line tells us that on our remote, named origin, there is a single branch, also called master. (Remember that our remote is the GitHub repo for this project).
Step 2: Create a new branch
Now that we know how to view branches, let’s make one! Bear in mind as we go that we have our master branch, our original project. We are now going to create a new version of the project, a branch, to play around with and make changes in locally on our computer — while the original version of the project, the master, remains safely unmolested up there on GitHub. We give the new branch a descriptive name to remind us what we intend to do while working in it. In this case, it’s going to be a simple “Hello World” thingy, so let’s call it hello_octo.
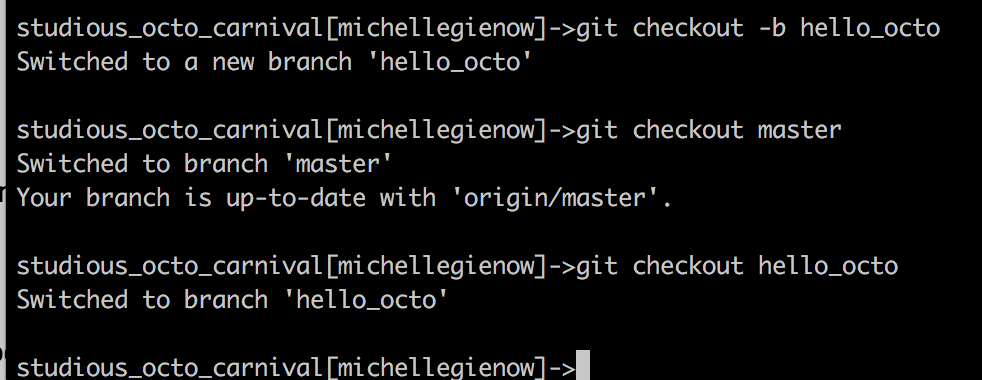
To create this new branch, type “git checkout -b branchNameHere” (so, in our case, “git checkout -b hello_octo”).
Assuming nobody else has already made a branch named “hello_octo”, git returns “Switched to a new branch ‘hello_octo’.” (In the case where a branch by that name already exists, git would tell us instead “fatal: A branch named ‘hello_octo’ already exists.” No big deal, just do git checkout -b again with a new name variation).
We can also use the git checkout command to toggle back and forth between our two branches. Type “git checkout branchName” to switch to that branch. So, “git checkout master” takes you to master while “git checkout hello_octo” takes you back to hello_octo branch.
If you try to switch to a branch that doesn’t exist, such as “git checkout hello_kitty”, git will let you know that’s a no-go:

How does git know what branch you’re currently on? Git is always watching what you do and keeps a special pointer called HEAD. Like the needle on a compass always points north, HEAD always indicates the local branch you’re currently on.
(We could also have created our branch using the git command “git branch branchNameHere”, and then switch to it with git checkout. However, the neat little shortcut with the “-b” in “git checkout -b branchNameHere” both creates the branch AND switches to it. I cannot tell you how many new-to-git coders generate error messages and frustration because they simply have not remembered to change to their new branch after creating it. Hence, we are sticking with git checkout -b, mmmkay?)
Making changes to our working branch
Now that we have multiple branches — our working branch to make changes on, and our master branch remaining safely unmolested — we can get to work. In our scenario, we are going to use our “hello_octo” branch for making and testing our changes, and then push these back up to the master branch on GitHub.
Remember to make sure you’re on your working branch, and not master, with good old git branch -a.
Step 3. Create a new blank file, named “hello_octo_world”:

(This blank file is just for demonstration purposes, so no worries that there is no file extension name/type).
Since it is brand new, right now this file is only on your branch. Use the “ls” command to view it:
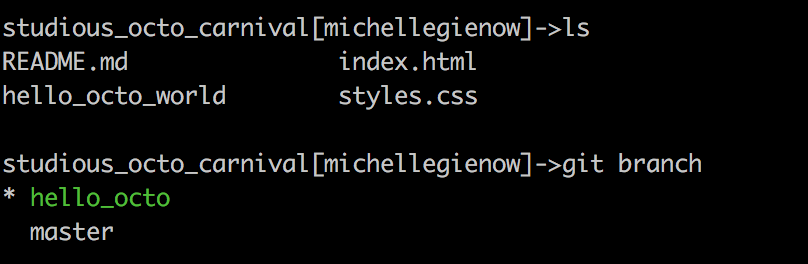
However, recall that we are on our working branch, hello_octo, where we created this new thing. The master doesn’t know anything about no hello_octo, because it is safely insulated from any willy-nilly changes we are making over here on the working branch. It is still the same serenely unchanged master we started with:
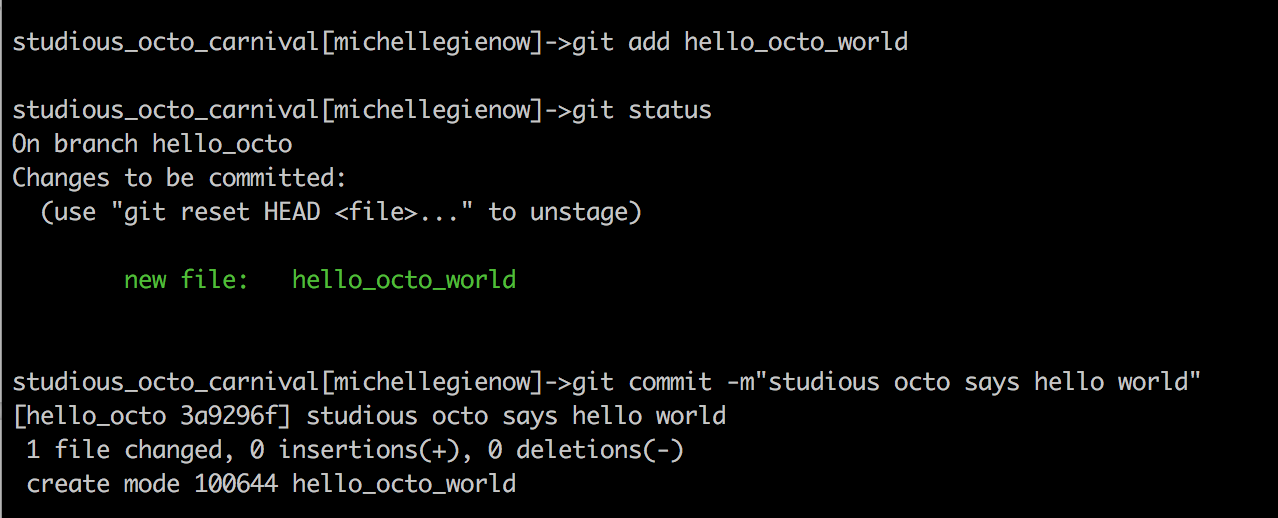
Step 4: Stage and commit our new file to working branch.
Now it is time to stage (add) and commit our new file on the working branch. (Sound familiar?). This will attach this new entity to the working branch in preparation for eventually moving it over to master. This file now exists on the hello_octo branch; as we saw above, it doesn’t currently exist on the master branch.
At this point you have just taken a snapshot of changes to the branch. In a real-world project, there are likely more changes and work to be done. Now is when you would go do this, making commits along the way at logical points. Remember that, on GitHub, commits represent your consecutive saves. Each commit has an associated commit message, which is a description explaining specifically what you did there and why. Commit messages capture the history of your changes, so future you, as well as other project contributors, can understand what you’ve done and why.
Merging Code Between Branches
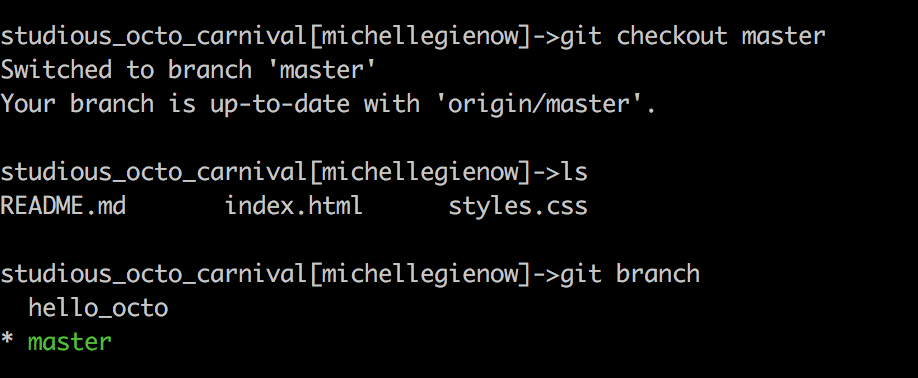
Once we are finally done with all changes and additions — and everything works* — it’s time to merge. The interesting part comes after we switch back to our master branch (which — say it with me! — we do with “git checkout master”). “Hello_octo_world” appears to be missing, but it’s not — currently, it exists on our working branch and we are on our master branch. I’m showing you this again because it is at the heart of understanding branches in git:

Now: in this exercise, “hello_octo_world” represents any change to any file (or the addition of a whole new file) that has passed all testing on our development branch, and is ready to be in production. The process of moving code between branches (often from development to production) is known as merging.
Very important: when merging, we need to be on the branch that we want to merge to. Basically, we will be telling git, “See that new thing? It’s ok to bring it over here now.”
Step 5: Merge working branch changes
In this case, since we want to merge from our working branch, where the “hello_octo_world” file exists, to our master branch, we need to be on the master.
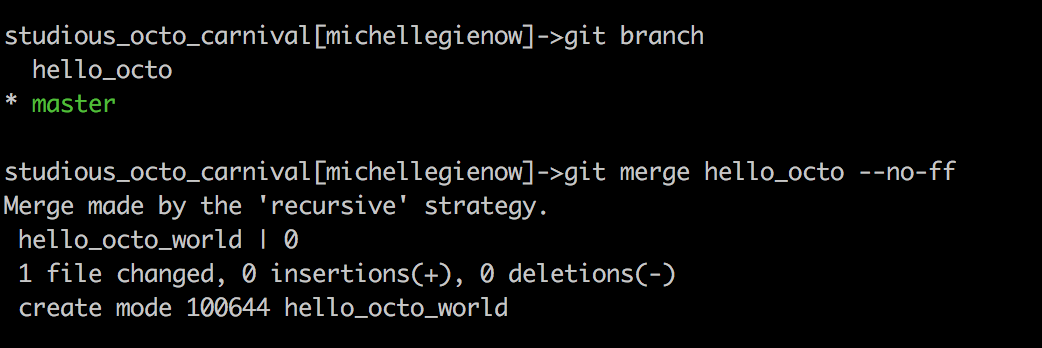
Once on the master branch, all we have to do is run the merge command. The best way to do this is to type “git merge –no-ff” — the additional “–no-ff” tells git we want to retain all of the commit messages prior to the merge. This will make tracking changes easier in the future:
Getting Back to GitHub
The last thing we now need to do is to let GitHub know that we’ve been monkeying around with master down here on our local development environment.
In other words, it’s time for git push. You got this!
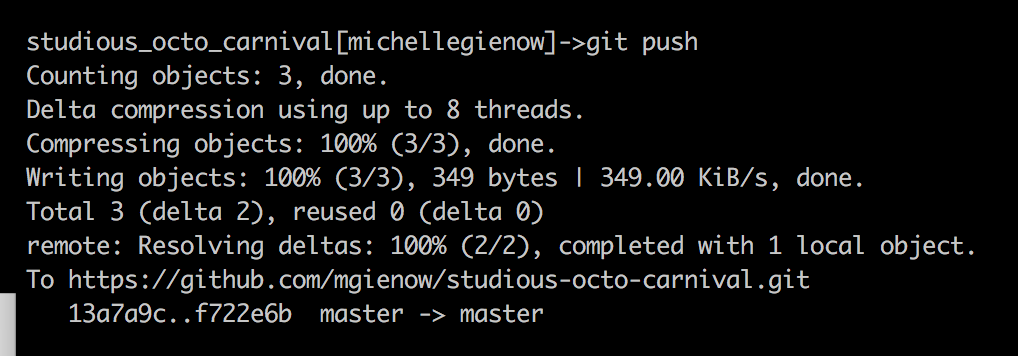
The git output confirms that the merge from your develop branch to the master branch on your local environment, has now been copied to the remote server: “master → master.”
And that’s it! We successfully created a working branch separate from master. Made changes to it. Staged and committed those changes. Then merged them back into master on our local working environment. Then, finally, pushed everything up to GitHub so that all versions of our project are the same, everywhere!
A Final Note
Some cleanup is in order now: since we have successfully merged our hello_octo branch, we no longer need it. To delete a merged branch, simply type “git branch -d branchName”:

No worries: if you accidentally attempt to delete a branch that has not yet been merged, git will throw an error.
So! This far we have been using an extremely simplified sample project, because at this point the most important thing is to understand and assimilate the git workflow. There is a lot more to merging than this in the real world — for example, what happens if you get error messages because your merge has conflicts? No worries, new git-ster, we will get there.
Your homework: create (“touch”) some more new files in the example project and practice making changes, staging, committing, and finally merging them back. Take care to understand where your HEAD is pointing — i.e., what your current branch is. Only commit changes to your working branch.
Because, remember: Don’t. Mess. With. The. Master.
Source: InApps.net
Let’s create the next big thing together!
Coming together is a beginning. Keeping together is progress. Working together is success.


