


- Home
- >
- Software Development
- >
- How (and What) to Gitignore – InApps Technology 2022
How (and What) to Gitignore – InApps Technology is an article under the topic Software Development Many of you are most interested in today !! Today, let’s InApps.net learn How (and What) to Gitignore – InApps Technology in today’s post !
Read more about How (and What) to Gitignore – InApps Technology at Wikipedia
You can find content about How (and What) to Gitignore – InApps Technology from the Wikipedia website
If you recall from our very first tutorial in this series, Git for Absolutely Everybody, $git init is the one-time command used for the creation and initial setup of a new repo. Executing $git init generates a brand new master branch upon which you commence building your brand new project. It also creates a new .git subdirectory in your current working directory, i.e., the project’s root. This sub-folder contains all the stuff that Git generates to track and store each file’s revision history.
Note the dot in front of the “.git” folder. This renders it functionally invisible, in both finder and terminal, unless we use a command to specifically expose it (Hint: $ls -a). If you haven’t noticed the .git subdirectory, much less gone digging around in there yet, don’t fret. Really the only reason we would want to even expose .git is as a check to make sure the working directory is indeed a Git repository. This is a handy ability, but otherwise, you will do best to leave .git alone.
Git makes this invisible on purpose: there is lots of important stuff inside, most of it beyond the ken of mere mortals and average devs. Suffice it to say .git, the folder, holds pretty much everything that makes Git, the versioning control software, do what we want it to do, and messing around with its contents can seriously wreck your project. Just do your job and trust .git to do its own.
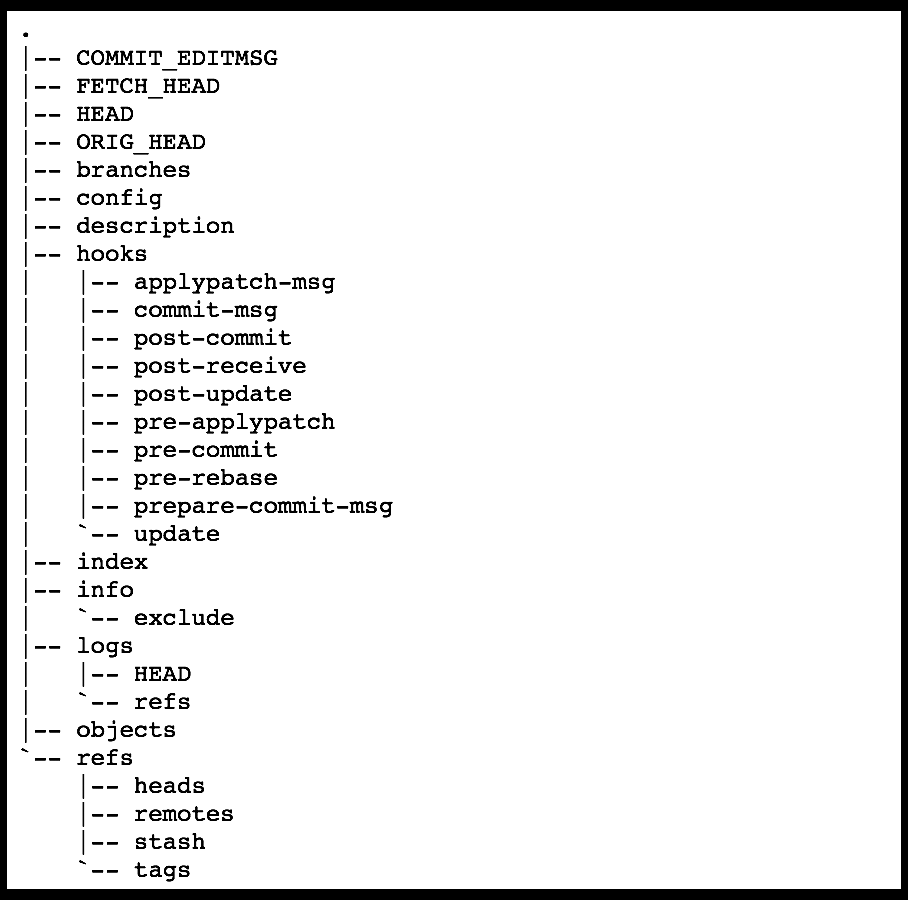
The contents of .git. See what I mean? Just. Don’t.
Gitignore It!
And I don’t just mean ignore the contents of .git.
There is another hidden file in your repo, also automatically generated when we run $git init, called .gitignore. Your .gitignore file names intentionally untracked files in order to tell git “Hey, don’t include these!” in its versioning work. Basically, it’s a list of files you want Git to, well, ignore.
How this works harkens back to Git’s distributed graph theory tree model. Git sees every file in your working directory as one of three things:
- Tracked — a file that has already been staged and/or committed;
- Untracked — a file not yet staged or committed
- Ignored — a file which Git has been explicitly told to ignore.
Ignored files are usually OS-specific files — that is, stuff your computer needs to render your project but that has nothing to do with your actual project. This is why we don’t want to include them in our repo: they’re unnecessary space wasters. GitHub may be free (for now), but it’s not infinite — .gitignore is a courtesy gesture from each user to only send the stuff that actually belongs in a project. Sometimes .gitignore contains files that are actually necessary for the project but not necessary to the repository, because they will always be generated/derived from whatever computer and platform you are running the project on.
Whew! That was a lot of high-level abstraction. Here’s a concrete example to help bring it on home: Say you’re on a Mac and you have .DS_Store files in all your directories. (You do, they’re everywhere, but also harmless, it’s an Apple thing). The .DS_Store name is an abbreviation for Desktop Services Store, and it’s a file that is autogenerated to appear in every folder (directory) you create. It stores the custom attributes of its parent folder, like the position of icons or the choice of a background image.
Obviously, you don’t need this information about your Hello Kitty desktop image to be tracked by Git, staged and committed and pushed to GitHub every time you do a commit. It has nothing to do with your project and will just sit there, never used, taking up memory. Just a little bit of memory, but if every single commit to GH contains unnecessary files, over 57 million repositories…well, it starts to add up. And so we tell Git to ignore the unnecessary.
How to .gitignore
We are dedicating an entire tutorial to .gitignore because, though the basic idea is simple enough, implementing it means drawing upon a confluence of concepts. This is something I have seen flummox enough of my students to realize that a walk-through is in order.
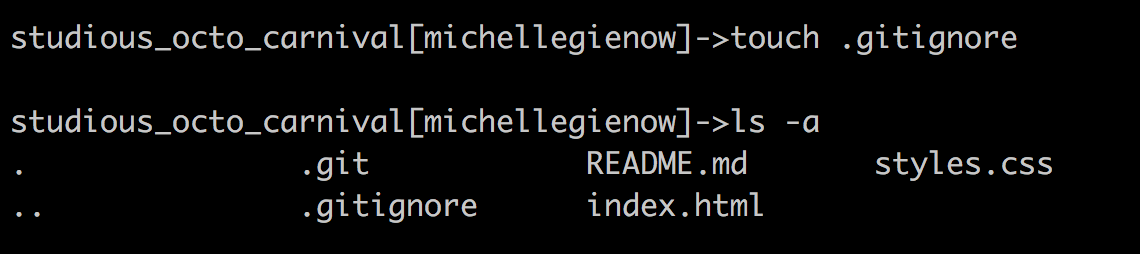
Step 1. Go to your project folder in terminal. (Remember studious_octo_carnival? We will use that as our example). Then type “$ls -a” to print out all the files in the project, both visible and hidden. And look there’s our .git:

However, there is not yet a .gitignore. We have to make one; Git does not automatically do this for us.
Step 2. Type “$ touch .gitignore” to create the .gitignore directory. Don’t forget the “.”!
Step 3. Open the project in your text editor of choice. Since we are using Atom. we type “$atom .” to launch Atom and open the current directory in it.
(Bonus tip: To activate access to Atom from terminal, first open Atom. Click the Atom menu in the top left corner, then click Install Shell Commands. Return to your terminal; from now on you can type “Atom” to simply launch Atom, or “Atom .” to launch the current working directory, or “$Atom ,/directoryName” to open a different directory).
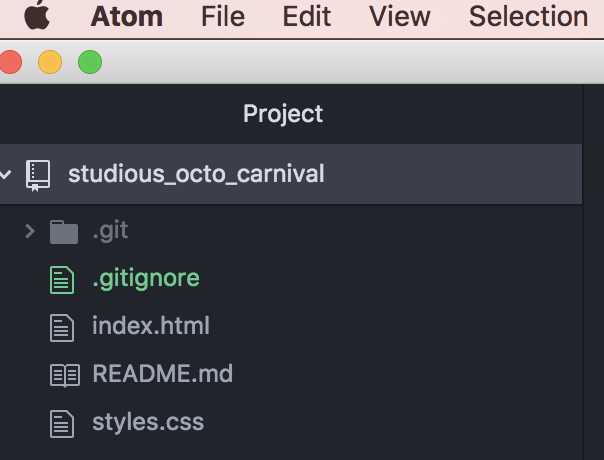
Notice how our new .gitignore file is green, meaning that it is untracked — i.e., we haven’t staged/added or committed it yet.
Step 5. Open the .gitignore file in Atom the same way you would any other file, like index.html. For some odd reason, this step seems the most arcane to my students, but: a hidden-with-initial-dot file works the same as any other. Just double-click on the directory name and Atom will open a window for .gitignore.
Step 6. Now the magic happens: we actually add the stuff we want Git to ignore.
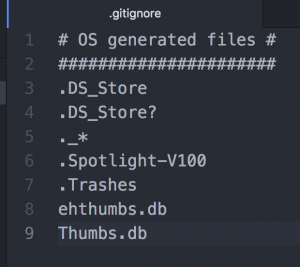
This is plain text, so we use # at the start of a line to indicate that it’s a comment. Then we just list the stuff we want Git to ignore. Here, I’m including all the cruft that the Mac OS generates in every directory that gets created. So, besides .DS_Store we have machine-generated files like Thumbs.db (which renders thumbnail images) and .Trashes (this is the space where removed files get stored before being permanently deleted. GH so does not need our trash!).
That’s it! Simply type the name of any file you want git to ignore in your .gitignore. Save it. Done.
Global .gitignore
Since so many of these pesky critters will be ignored in every project, it’s even handier to create a global .gitignore file, which is a list of files-to-be-ignored in every git repository on your computer.
Step 7 (optional). Go to terminal and CD to your top level directory (usually, the one that has your username; it contains all your files and on Macs has the little house icon next to it in Finder if you are unsure).
Now type
|
$git config —global core.excludesfule ~/.gitignore global |
Navigate to the new global .gitignore directory in your text editor, and add All The Bad Things you want git to always ignore. The OS generated system files are a good place to start.
GitHub has a helpful list of things it will never ever use that it sincerely hopes you will .gitignore on both their, and your own, behalf.
Caution: Recursion does apply
Unfortunately .gitignore is not recursive, meaning that if you have already committed a project, and then go back to create a .gitignore, you’ve got some groundwork to do first. If you want to ignore a file that you’ve committed in the past, like say good ol’ .DS_Store, you’ll need to first delete that file from your repository and then add a .gitignore rule for it.
There is a handy option called “–cached” (two dashes plus the word “cached”) that, when used with the Git remove command $git rm results in the file being deleted from your repository but remaining in your working directory as an ignored file.
Any file with a “.log” extension is fair game for .gitignore inclusion. Git generates its own logs, thank you, and doesn’t require yours. If you’ve already committed a project and wanted to go back to remove the log files, this is how that would look:
|
$ git rm —cached *.log $ git commit –m “Start ignoring *.log files” |
We have to do a commit with message here, because these useless files are currently tracked by Git — so removing them becomes a part of the version history.
Setting up .gitignore might feel like an unnecessary extra step when you’re a new programmer and overwhelmed with all the things you DO want Git to pay attention to, much less the things you don’t. But I promise you that taking the time to do this with every repo you make is an important step to becoming a good GitHub citizen — and being taken seriously as a programmer.
Feature image by Trust “Tru” Katsande on Unsplash.
Source: InApps.net

Let’s create the next big thing together!
Coming together is a beginning. Keeping together is progress. Working together is success.


